
A month or so ago I was contacted and asked if I would take a look at two shelters to see if I would be able to modify them and where required carry out minor repairs. The shelters were from the same manufacturer and other than the main material used, are pretty much the same.
When the shelters arrived, I pitched them and made several observations, took some pictures and contacted the owner with some suggestions and to seek permission to continue. The mods and repairs were agreed, and work started.
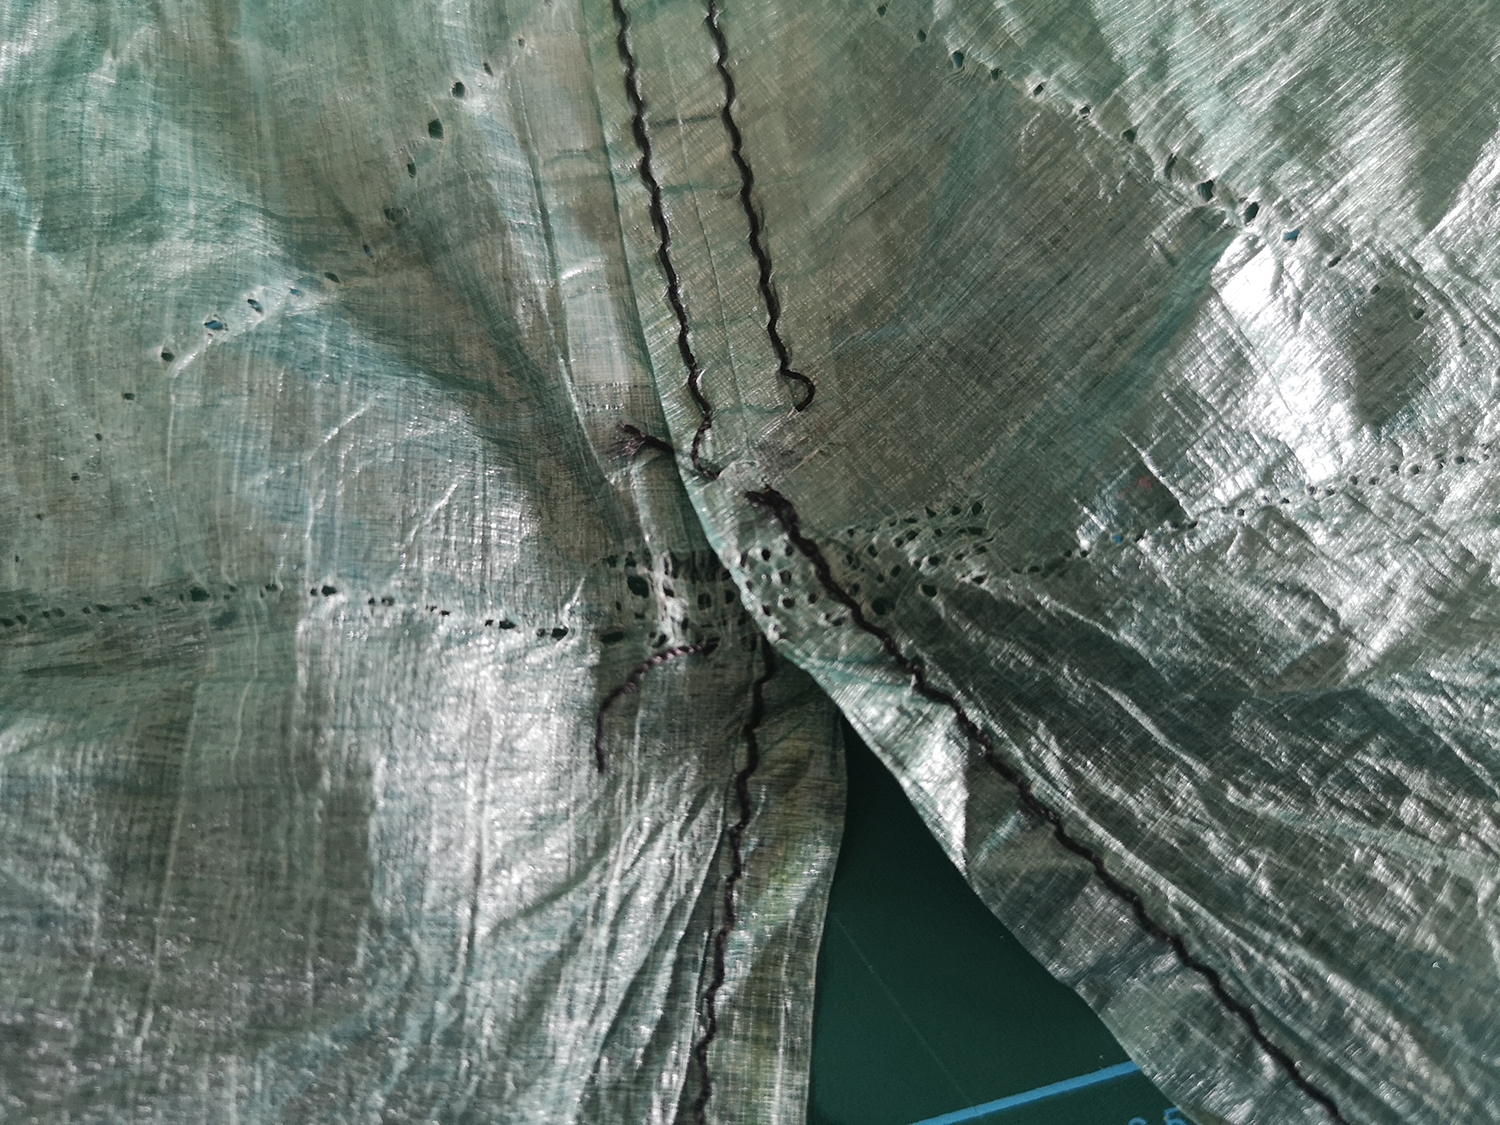
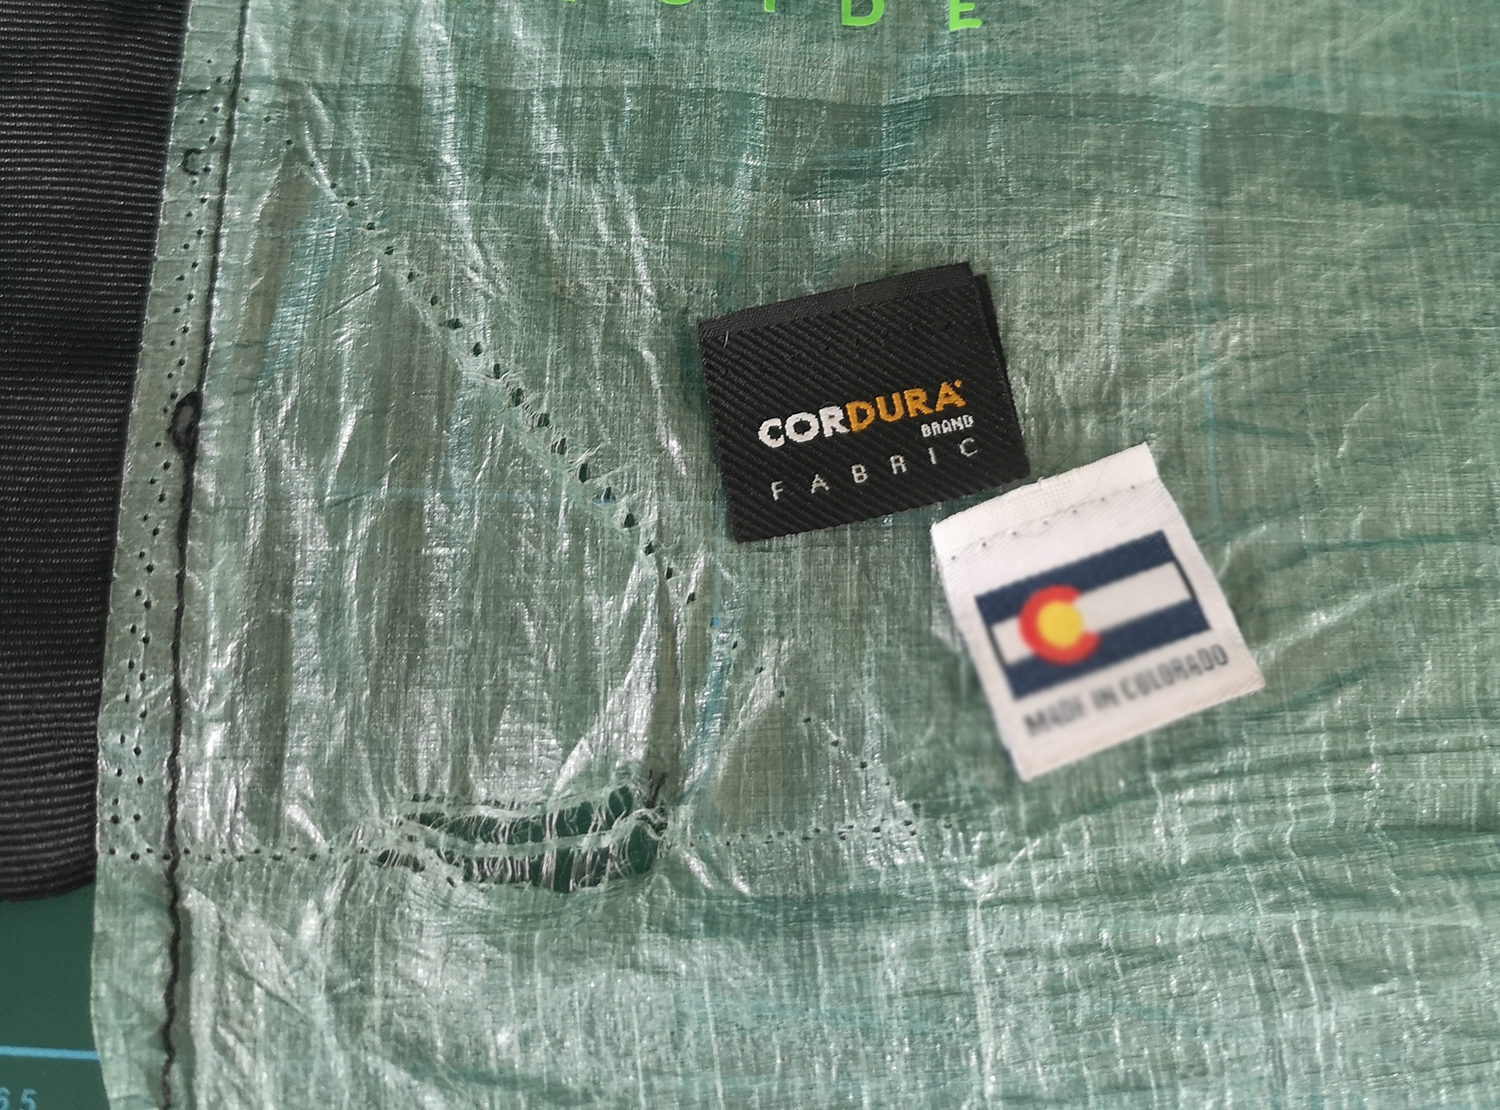
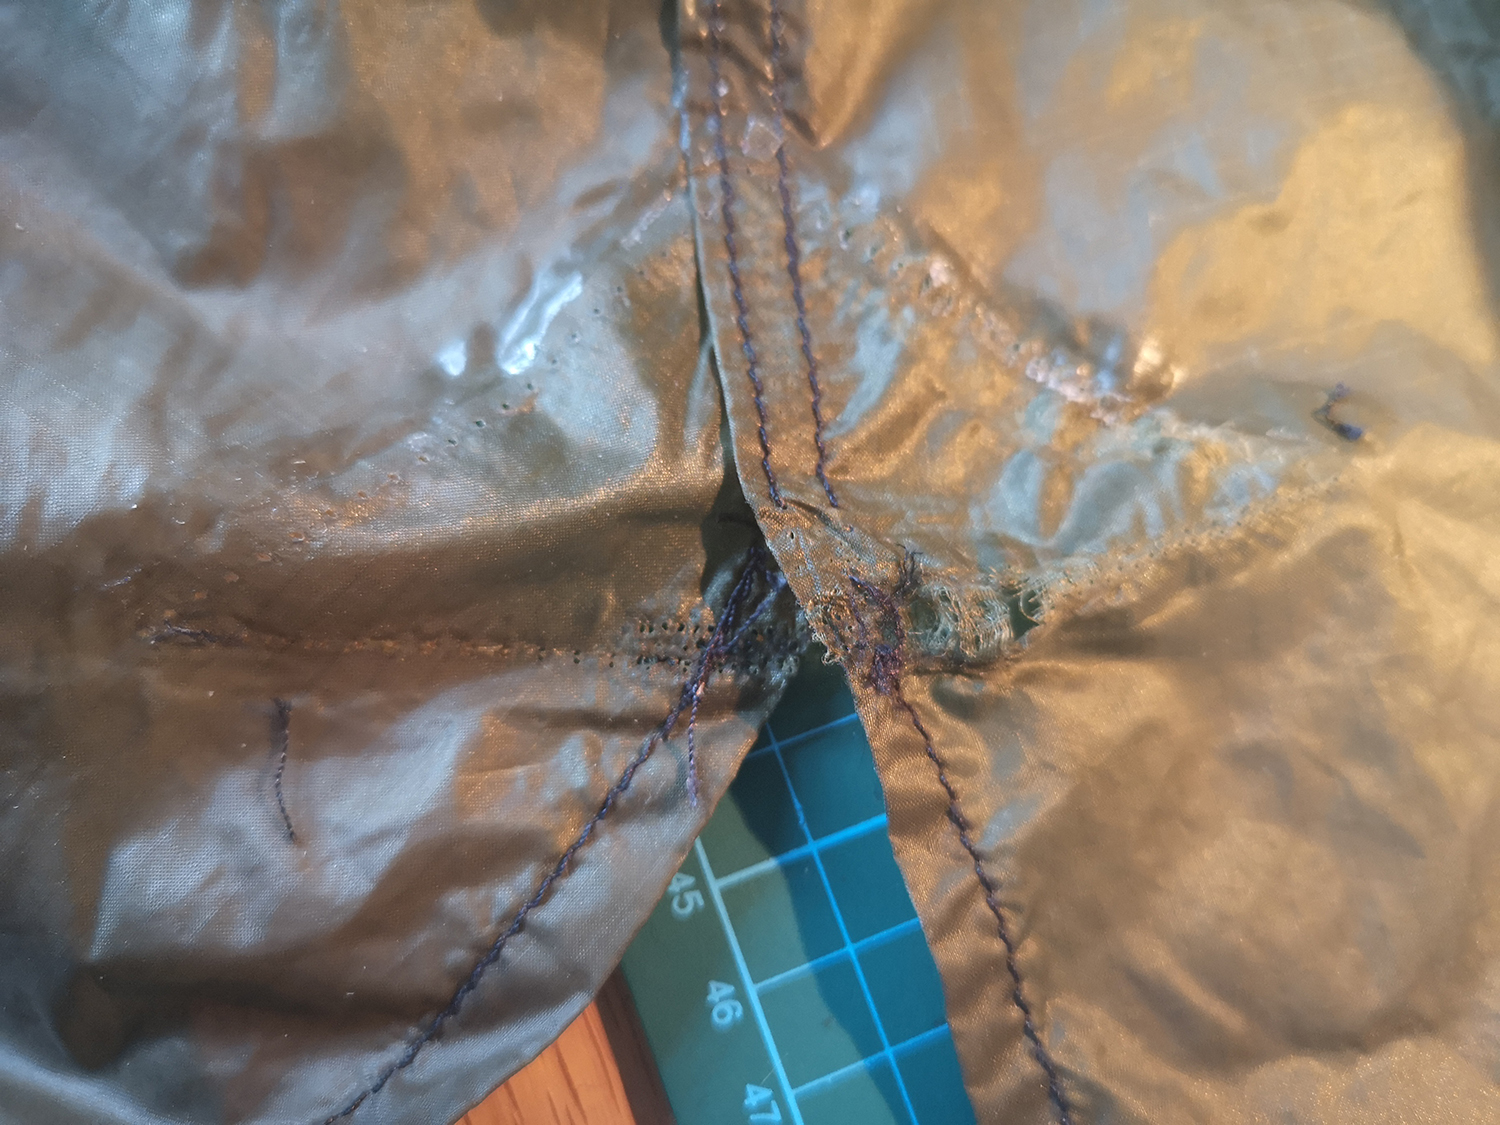
I started on the DCF model first and noted that all the guy points were reinforced with Cordura, 500D I believe. In all of the ground level guy points there were visible stretch / tear marks where the Cordura patches had been sewn to the fly. I put this down to the difference in tensile strength and stretch between the DCF and Cordura.
As I continued, removing each guy out I started to find more and more stretch / large holes in the DCF and again contacted the owner to keep them updated. As you can see from the pictures, some of the damage was pretty extensive. The owner advised that the DCF model had only been used on a couple of occasions and it had only been winds up to around 30mph +/- 5mph.
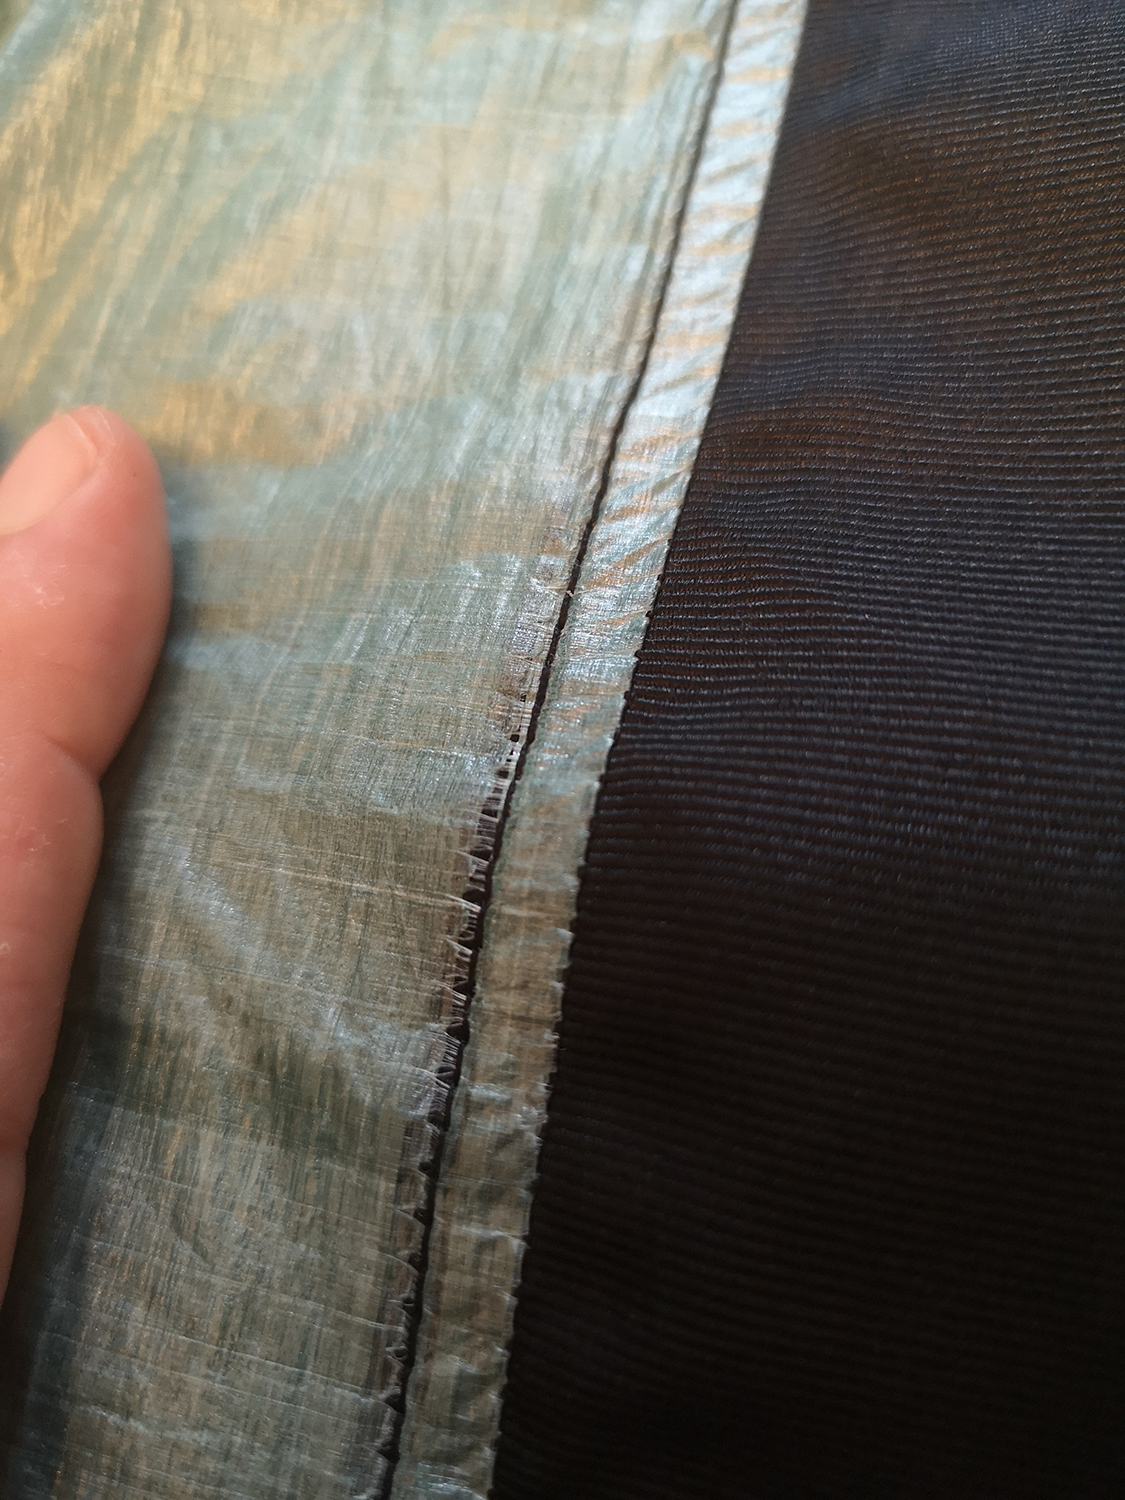
I found that the seam stitches had not been finished how I would expect them to be, there was no lockstitch and the ends were simply loose. This did not overly concern me as they would be stuck in place later.
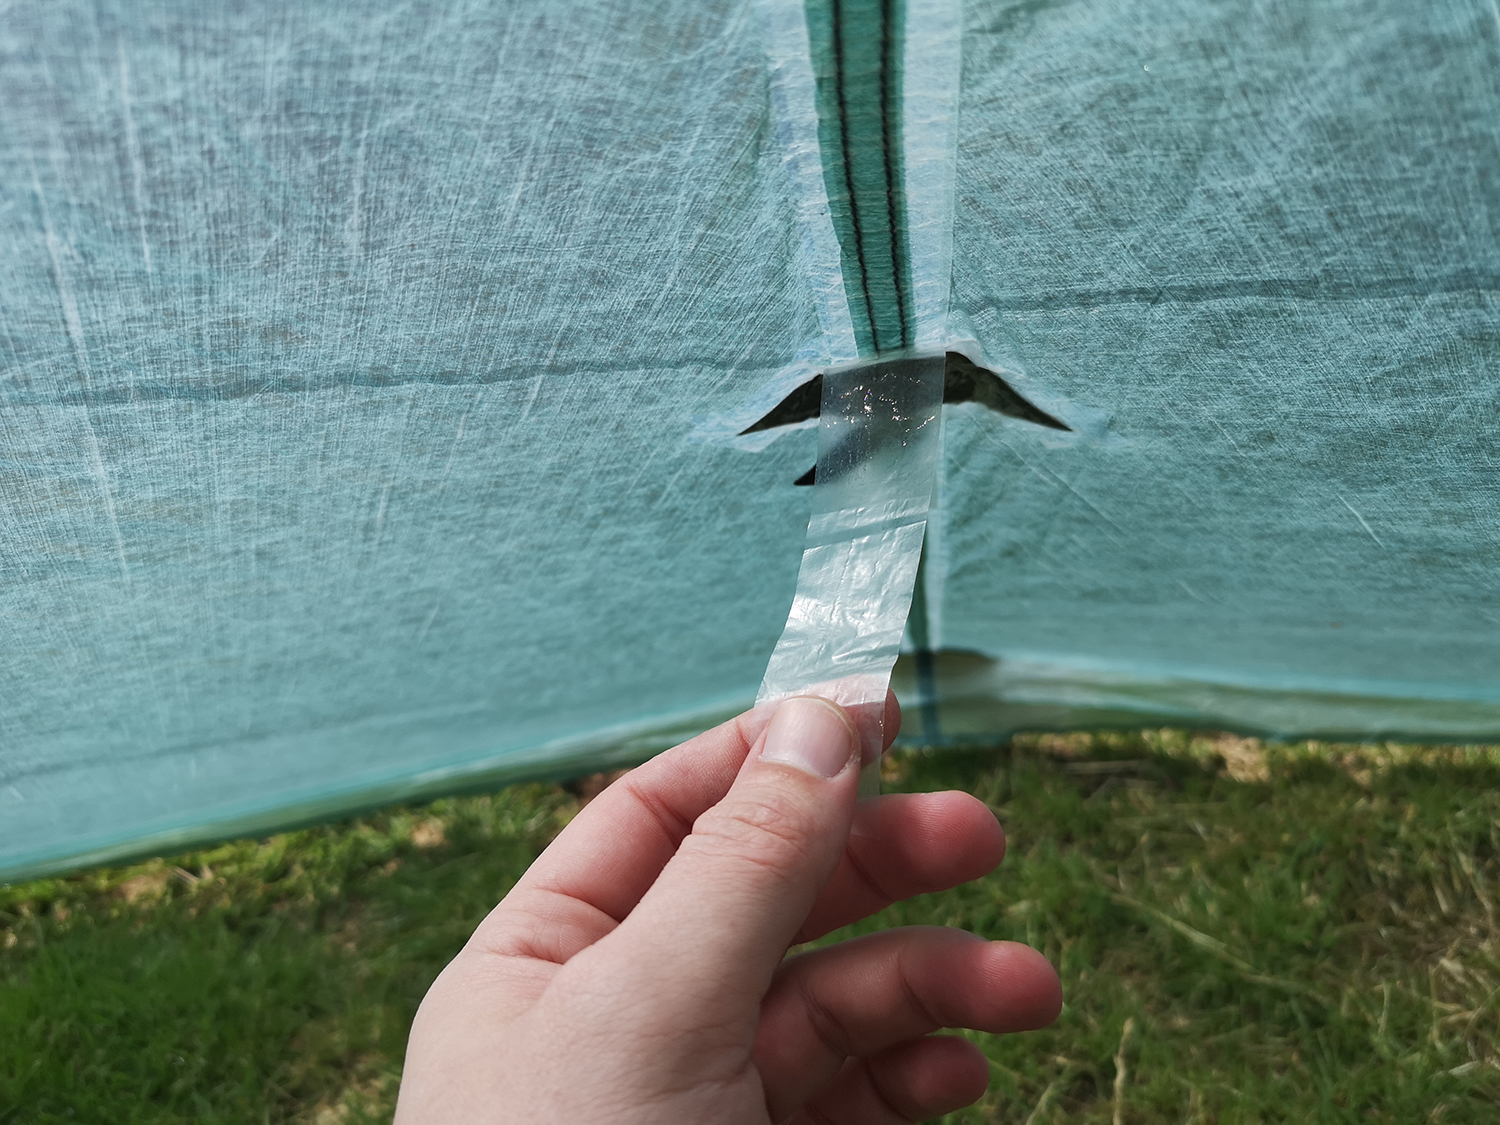
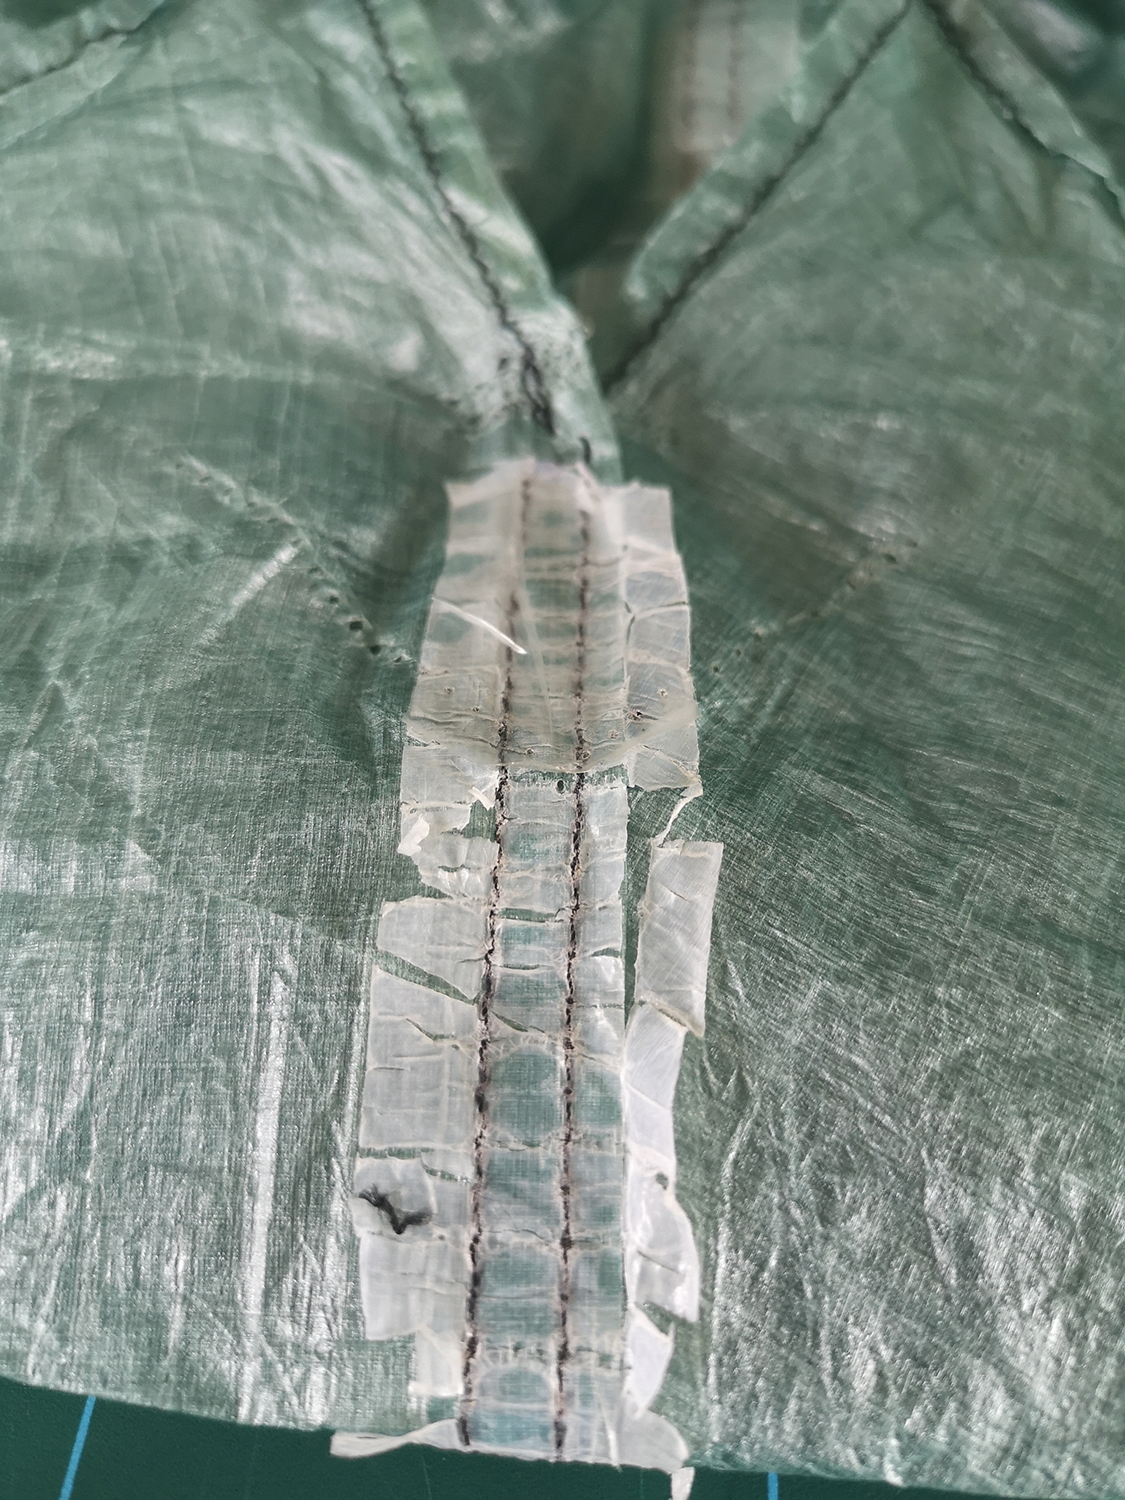
The shelter had originally been factory sealed internally using a type of PU tape. The has flaked and or peeled off in most areas leaving a sticky, flaky mess which I cleaned off, preparing each guy point. In order to add some seam strength and waterproof the seams, the owner had sealed the seamed externally using DCF tape.

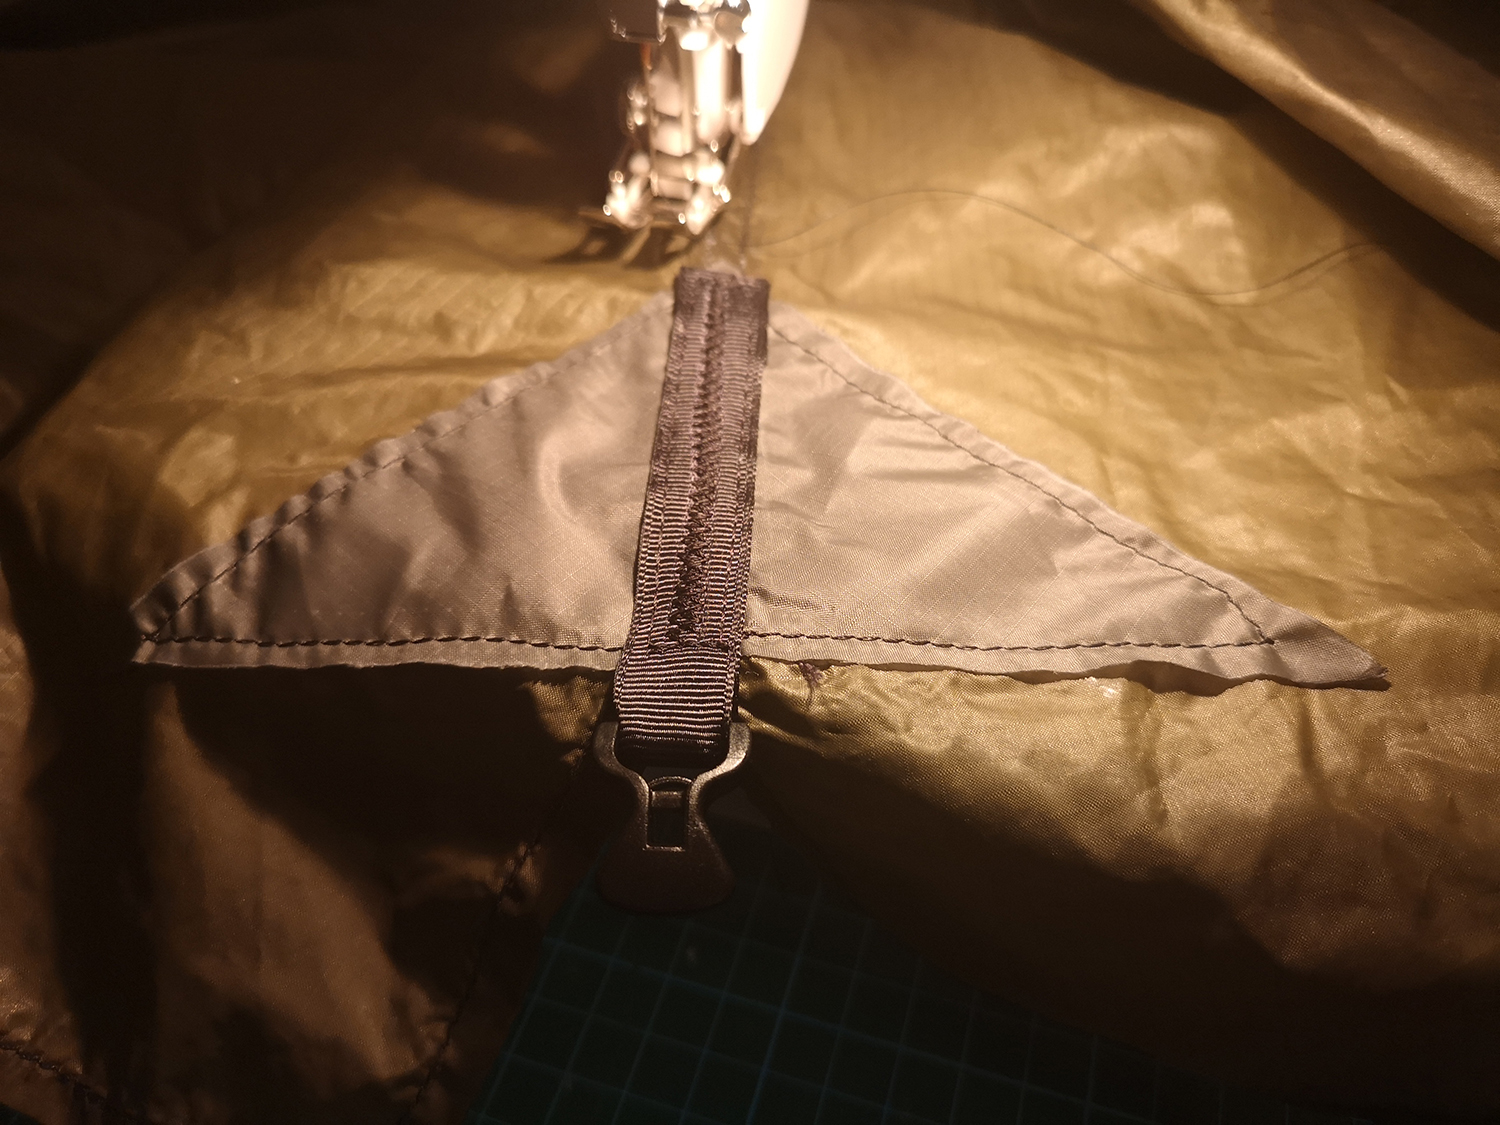
Each of the Cordura triangles were replaced with 1oz bonded DCF patches, 1.65x the size of the original to cover and seal the holes and tears in the DCF. Originally, there was a patch on the front and back side of the panel, I did the same so that the holes were covered each side and the strength of the areas was increased.
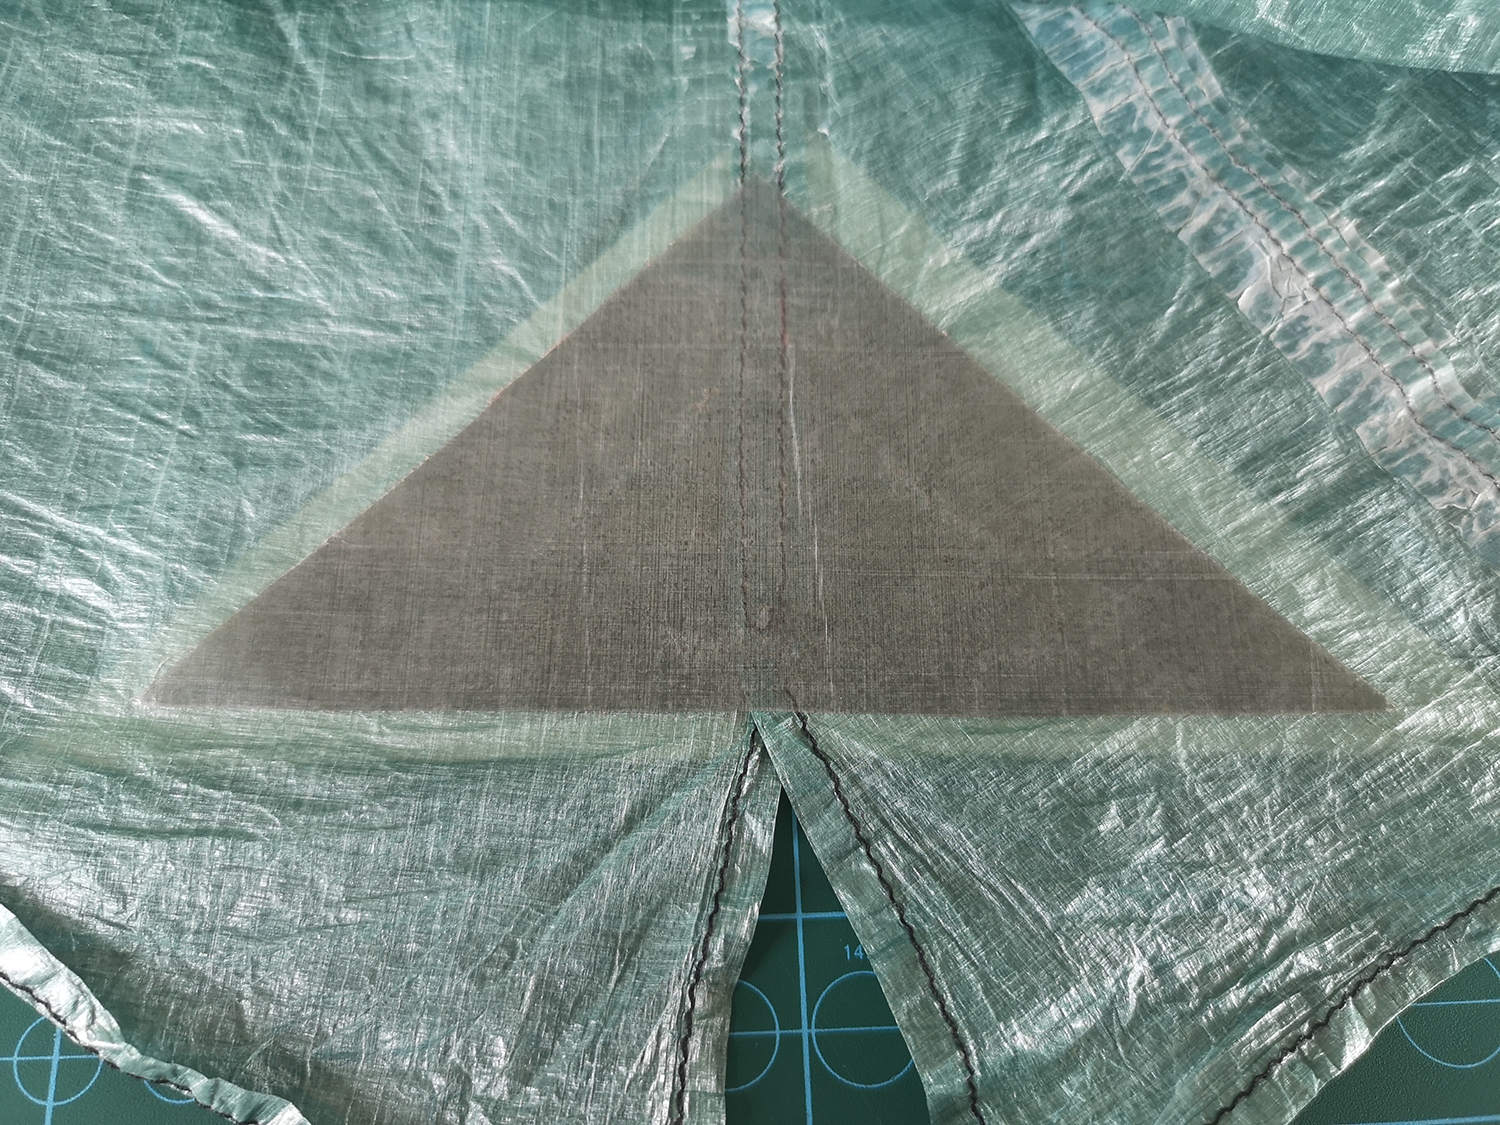
(The lighter triangle underneath is a bit of card so I could see what I was doing easier)
In places, were the bartack holding the lineloc had pulled the DCF so much, I added a second bonded patch either side. This was in addition and underneath the 1oz triangular patch and in an effort to strengthen the area and stop the hole increasing in size.
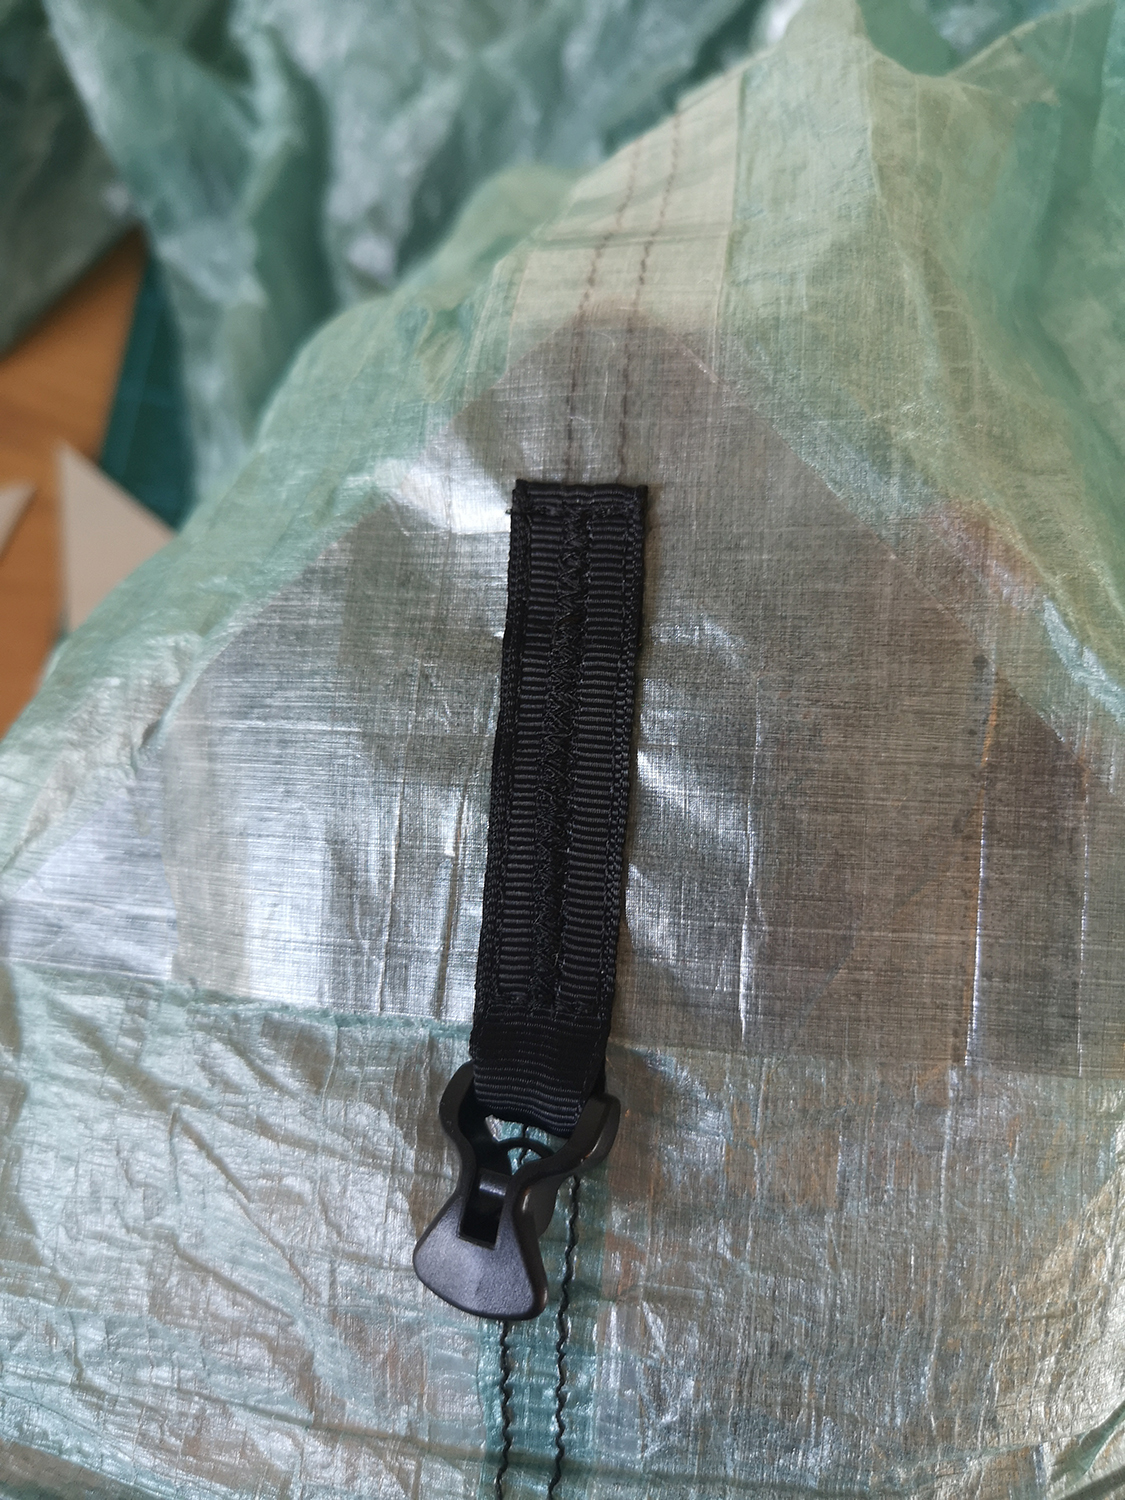
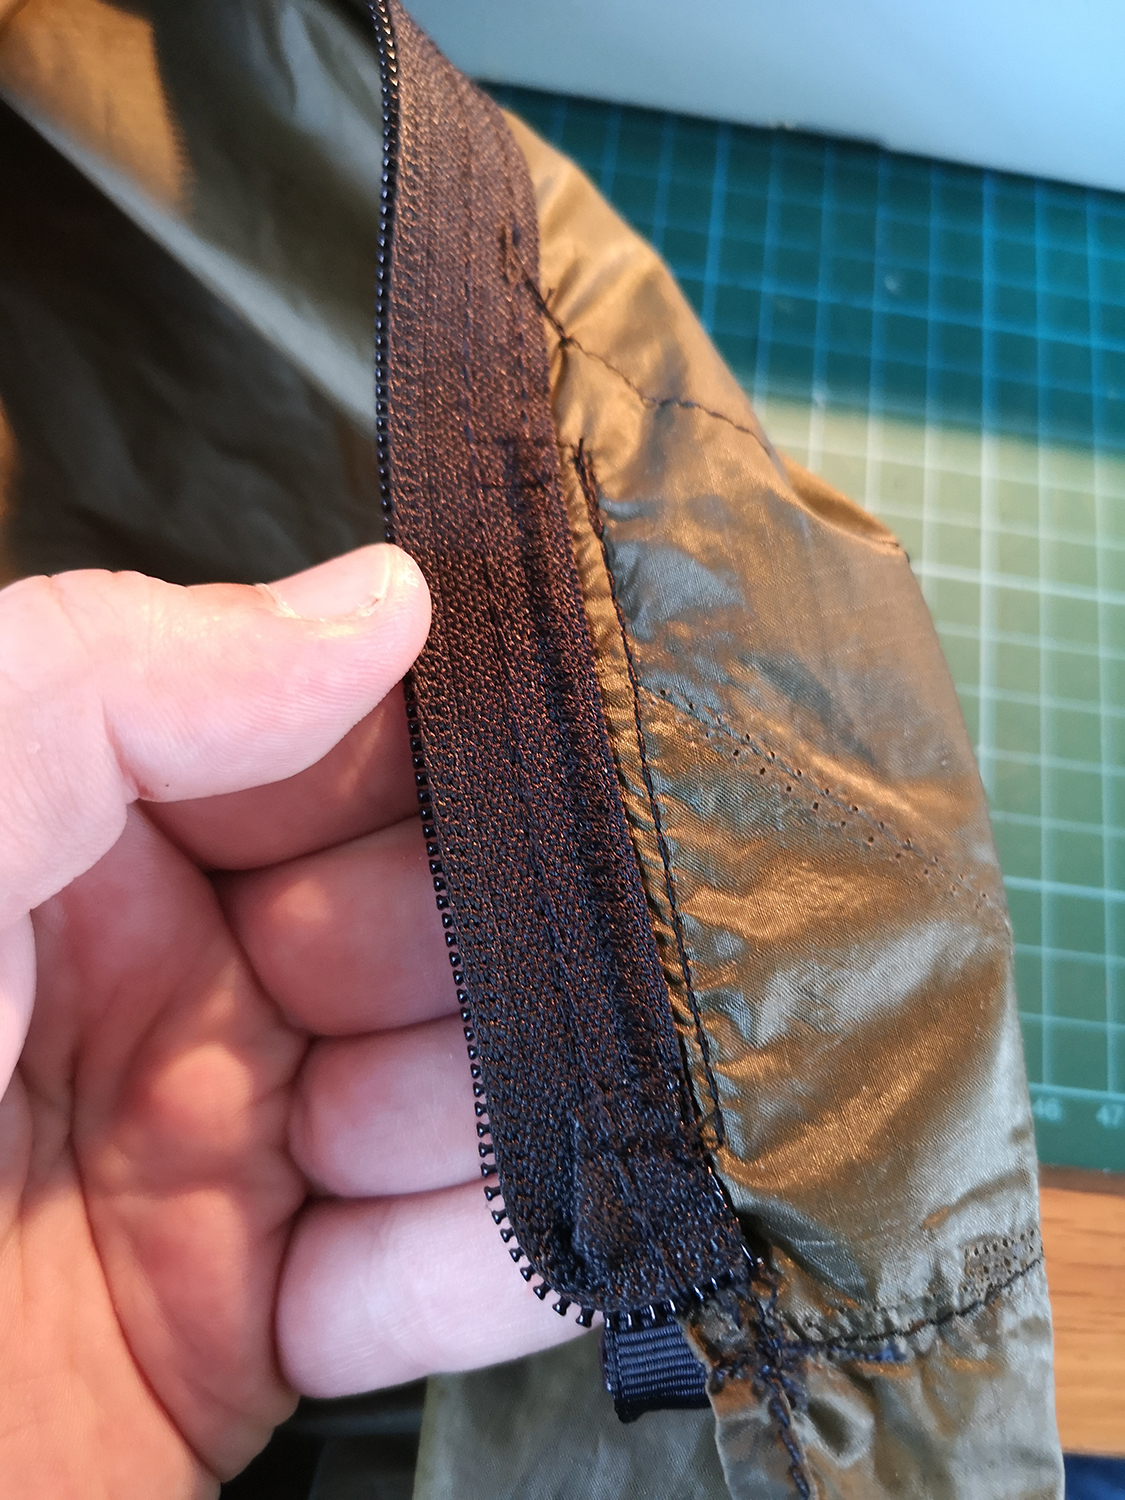
The zip was also pulling along nearly the entire length, I taped this from top to bottom on both sides adding strength and in a hope to stop the zip pulling more.
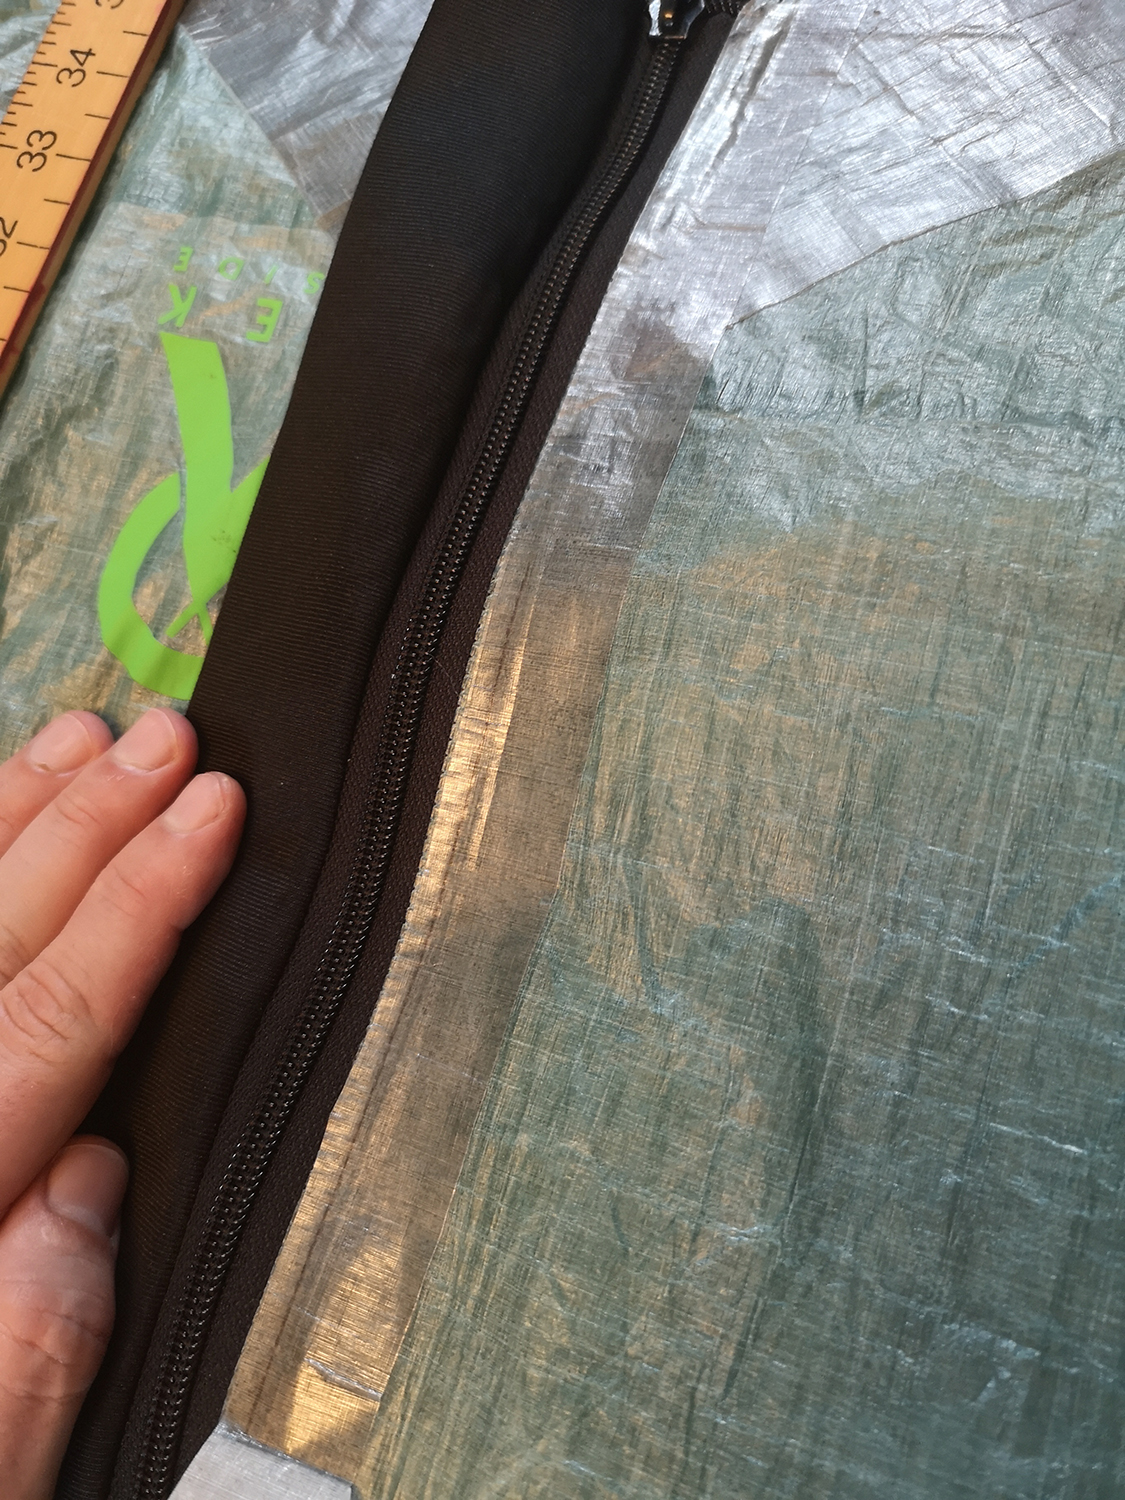
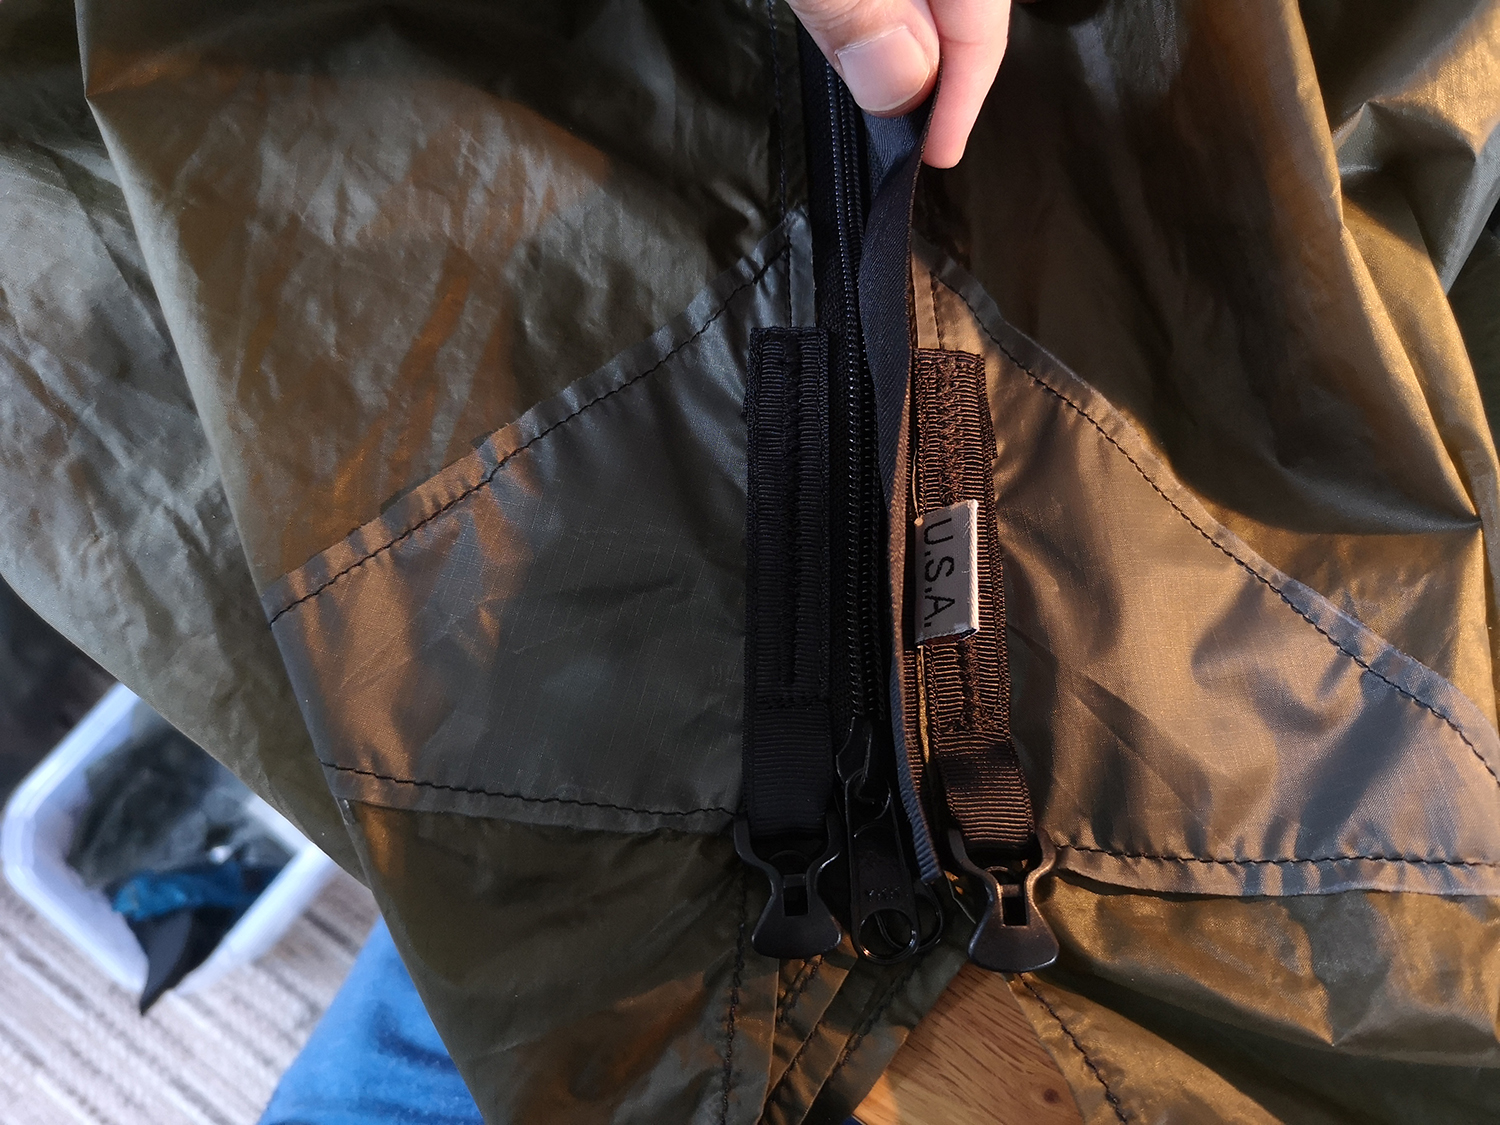
The DCF where the door guy outs had been originally attached were both badly damaged. Additional DCF patched were applied here. As with other shelters I own and have worked on, I added a Duraflex buckle at the bottom of the zip to try and reduce pulling / pressure on the zip and.
Moving on to the Silnylon version of the shelter. As above, I found that all ground level tie outs had pulls and tears in the silnylon where the Cordura had pulled. I again put this down to the difference in material strengths and stretch properties.
I removed all the Cordura triangles and replaced them with heat cut 40D silnylon triangles.
In a couple of places, where the lineloc had been bartacked in place, the Silnylon was badly damaged with a large hole. I built up the area with a few layers of seam grip and then added a small silnylon patch followed by a slightly larger one both seam gripped in place before adding the triangle. This worked very well and I was happy with the strength of the repair.
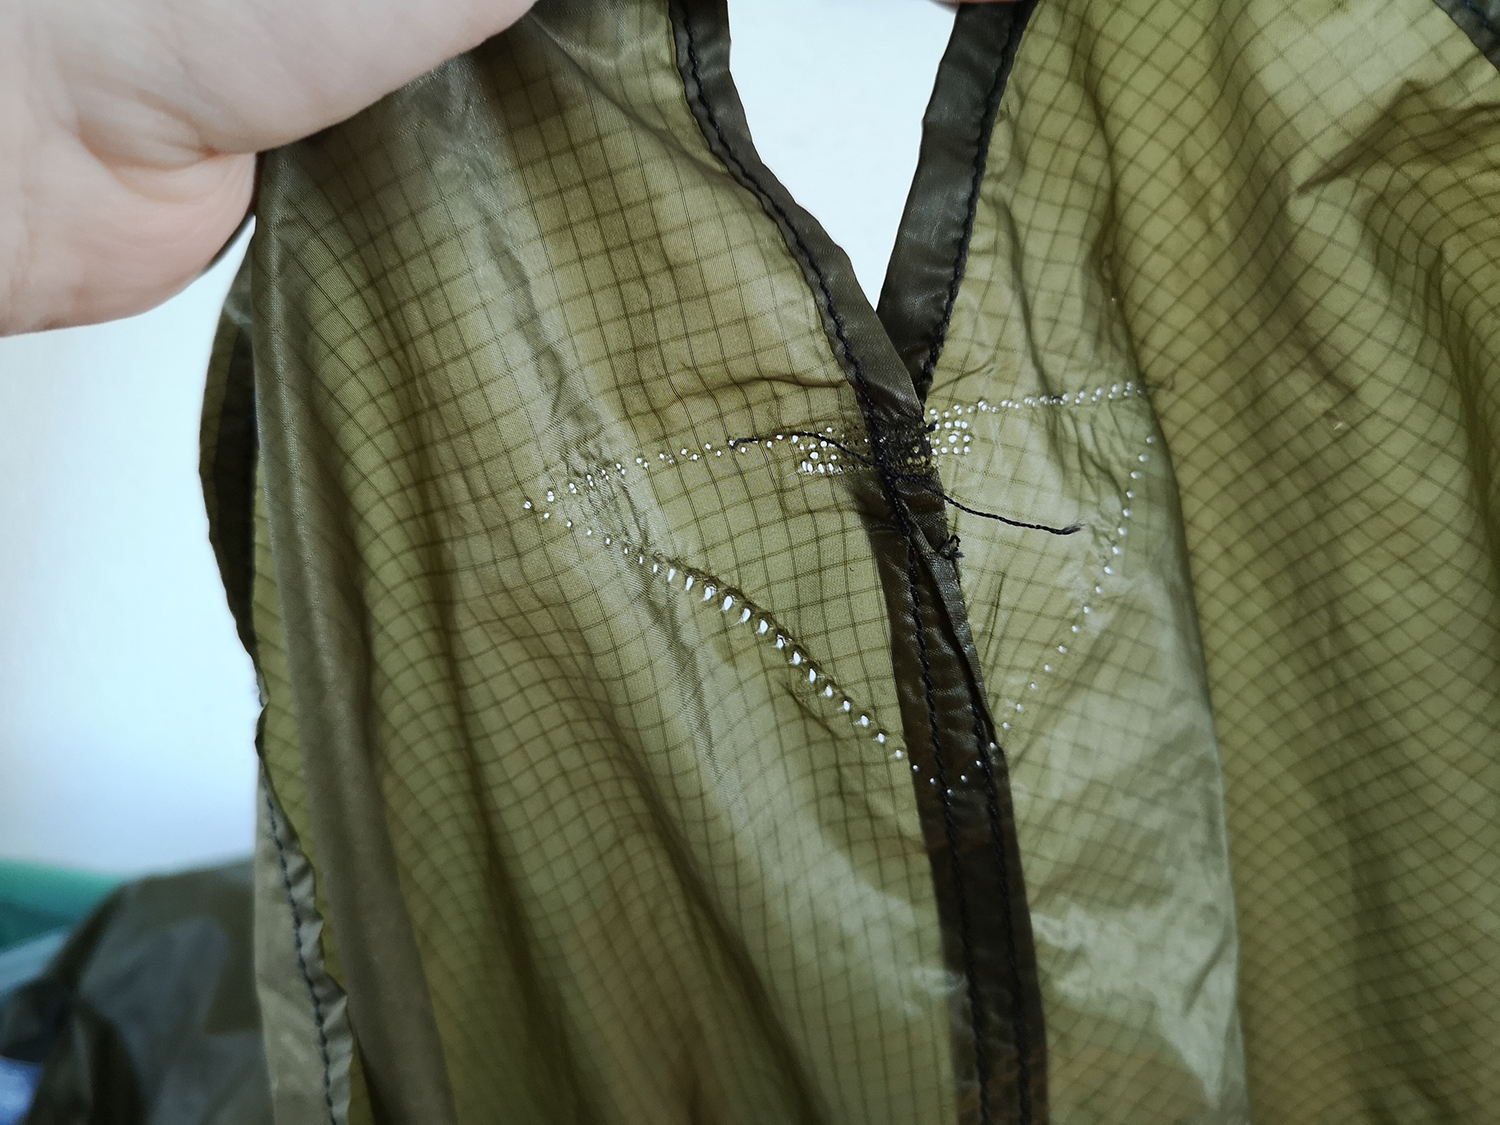
The seams on the Silnylon version were also not finished as I would expect, the thread simply left loose and on two of the seam they had pulled out where the shelter had stretched in use. As best I could, these two seams were re-stitched and the loose thread glued in place with seam grip as there was not enough left to create a lockstitch.
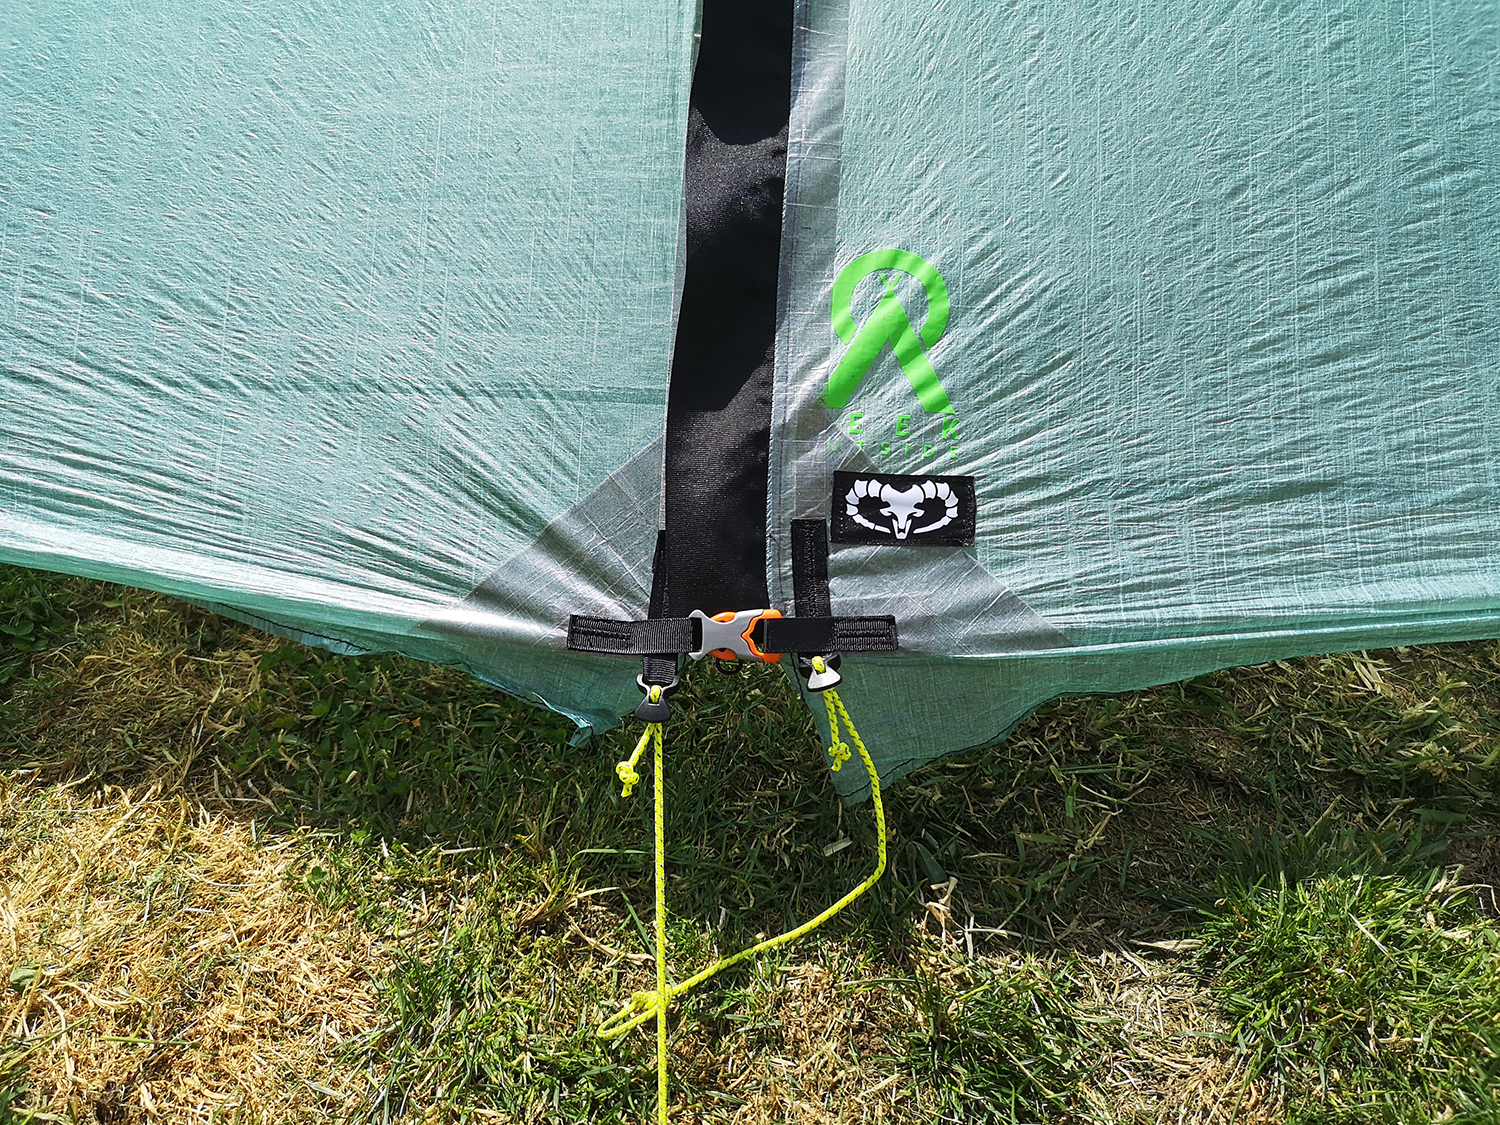
There are two doors on the Silnylon version. The original guy outs were sewn in to the seam of the silnylon with a Cordura triangle either side. The fabric in these areas was badly pulled as this is a high stress area with the zip closure and tension of the shelter pulling. I replaced the Cordura with silnylon triangles and then secured the guy outs through the edge of the zip, through the fly and both triangles. This had added a lot of strength to this area. I did not add buckles to either door on the silnylon version as there was only really the fly to attach them too and I did not want them adding further stress to an area that was already damaged/repaired.
Since completing the work on the above shelters, I have been contacted by someone with a Pre Tents Soloist that has a similar issue with one of the corner guy points. The main fly fabric has pulled. Potentially the same issue with the reenforcement having different strength/stretch properties to the main fabric. As this is a brand new, used twice shelter, they are sending it back for a replacement.
When the shelters arrived, I pitched them and made several observations, took some pictures and contacted the owner with some suggestions and to seek permission to continue. The mods and repairs were agreed, and work started.
I started on the DCF model first and noted that all the guy points were reinforced with Cordura, 500D I believe. In all of the ground level guy points there were visible stretch / tear marks where the Cordura patches had been sewn to the fly. I put this down to the difference in tensile strength and stretch between the DCF and Cordura.
As I continued, removing each guy out I started to find more and more stretch / large holes in the DCF and again contacted the owner to keep them updated. As you can see from the pictures, some of the damage was pretty extensive. The owner advised that the DCF model had only been used on a couple of occasions and it had only been winds up to around 30mph +/- 5mph.
I found that the seam stitches had not been finished how I would expect them to be, there was no lockstitch and the ends were simply loose. This did not overly concern me as they would be stuck in place later.
The shelter had originally been factory sealed internally using a type of PU tape. The has flaked and or peeled off in most areas leaving a sticky, flaky mess which I cleaned off, preparing each guy point. In order to add some seam strength and waterproof the seams, the owner had sealed the seamed externally using DCF tape.
Each of the Cordura triangles were replaced with 1oz bonded DCF patches, 1.65x the size of the original to cover and seal the holes and tears in the DCF. Originally, there was a patch on the front and back side of the panel, I did the same so that the holes were covered each side and the strength of the areas was increased.
(The lighter triangle underneath is a bit of card so I could see what I was doing easier)
In places, were the bartack holding the lineloc had pulled the DCF so much, I added a second bonded patch either side. This was in addition and underneath the 1oz triangular patch and in an effort to strengthen the area and stop the hole increasing in size.
The zip was also pulling along nearly the entire length, I taped this from top to bottom on both sides adding strength and in a hope to stop the zip pulling more.
The DCF where the door guy outs had been originally attached were both badly damaged. Additional DCF patched were applied here. As with other shelters I own and have worked on, I added a Duraflex buckle at the bottom of the zip to try and reduce pulling / pressure on the zip and.
Moving on to the Silnylon version of the shelter. As above, I found that all ground level tie outs had pulls and tears in the silnylon where the Cordura had pulled. I again put this down to the difference in material strengths and stretch properties.
I removed all the Cordura triangles and replaced them with heat cut 40D silnylon triangles.
In a couple of places, where the lineloc had been bartacked in place, the Silnylon was badly damaged with a large hole. I built up the area with a few layers of seam grip and then added a small silnylon patch followed by a slightly larger one both seam gripped in place before adding the triangle. This worked very well and I was happy with the strength of the repair.
The seams on the Silnylon version were also not finished as I would expect, the thread simply left loose and on two of the seam they had pulled out where the shelter had stretched in use. As best I could, these two seams were re-stitched and the loose thread glued in place with seam grip as there was not enough left to create a lockstitch.
There are two doors on the Silnylon version. The original guy outs were sewn in to the seam of the silnylon with a Cordura triangle either side. The fabric in these areas was badly pulled as this is a high stress area with the zip closure and tension of the shelter pulling. I replaced the Cordura with silnylon triangles and then secured the guy outs through the edge of the zip, through the fly and both triangles. This had added a lot of strength to this area. I did not add buckles to either door on the silnylon version as there was only really the fly to attach them too and I did not want them adding further stress to an area that was already damaged/repaired.
Since completing the work on the above shelters, I have been contacted by someone with a Pre Tents Soloist that has a similar issue with one of the corner guy points. The main fly fabric has pulled. Potentially the same issue with the reenforcement having different strength/stretch properties to the main fabric. As this is a brand new, used twice shelter, they are sending it back for a replacement.

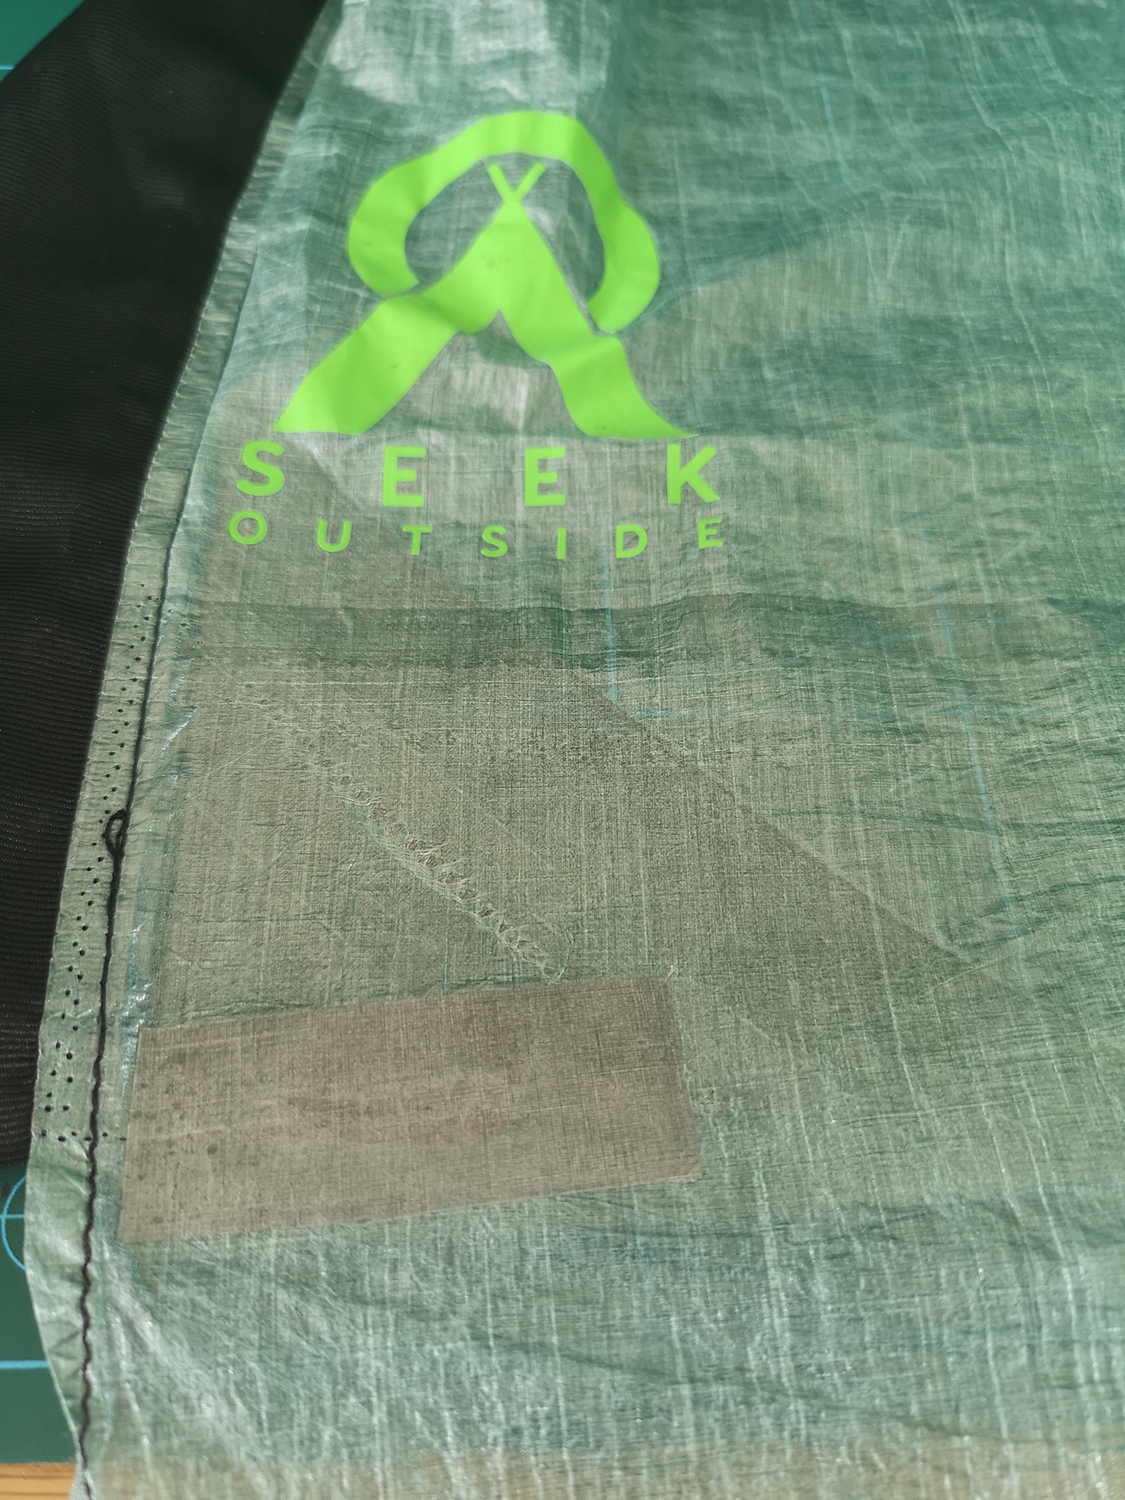
 I was amazed when I clocked the logo. I've had two SeekOutside sil shelters and couldn't fault the models I had. Both stood us very well in the times we used them. It's quite scary to think of the money involved in the initial outlay for those shelters and then to find the quality is sub par.


